Integrate Jira
Connect Jira with Notion for a seamless experience that keeps you and your team up to date 🔗
Notion’s integration with Jira allows you to do a few different things. You can insert Jira links into Notion pages to quickly access or preview them, or you can sync your Jira projects and issues to Notion databases so you can track all of your work in one place. Read on to learn about the different forms of the integration and how you can set them up.

Note: Link previews only work with Jira Software.
Paste a Jira link into Notion, then select Preview in the menu that appears to see a live preview of the project or issue. If you haven’t already connected Jira with Notion, you’ll be prompted to when you paste your Jira link into Notion. Learn more about link previews in this article →
Note: Link mentions work with all Jira Cloud products.
Paste a Jira link into Notion, then select Mention in the menu that appears to easily reference a project or issue in your documents. If you haven’t already connected Jira with Notion, you’ll be prompted to when you paste your Jira link into Notion. Learn more about link mentions in this article →
Note:
In order for all members of a workspace to use the integration, a workspace owner must set the integration up first.
You can create a Jira service account to set up this integration — just make sure the service account has access to any projects you want to sync into Notion beforehand.
Synced databases work with Jira Cloud products (Jira Software, Jira Product Discovery, Jira Work Management, and Jira Service Management), with support for Jira Server coming soon! The integration also works with all issue types.

Have you already created a synced database with Notion? We’ve improved the experience. Connecting Jira to Notion using the new Jira Sync means:
You get faster, more reliable syncs from Jira by using an Admin API token instead of a user token.
Instead of having all your Jira items synced into one database without being able to customize what is carried into Notion, Jira projects and issues will be mapped to Notion projects and issues databases (in line with our Notion projects template).
You can take full advantage of all of Notion’s project management features, including the Status property, automations, and charts. For example, you can create rollups to see the completion rate of your projects based on their associated tasks.
You can also use Notion AI to quickly get answers about your Jira projects with Q&A.
Jira Sync displays your Jira projects and issues as Notion projects and issues databases. This setup allows you to see and track multiple projects using a variety of helpful views, filters, and sorts. You can even use identity mapping to connect Jira identities to Notion profiles so that you can see who’s responsible for what in synced Notion databases.
There are a few ways to start setting up your synced database:
Go to
Settings & membersin your sidebar →Import→Jira Sync.Go to
Settings & membersin your sidebar →My connections→Jira Sync.In a page, use the slash command
/jira syncand selectJira Syncin the menu that appears.Copy and paste a Jira link into a page.
If you’ve previously created a Jira synced database in Notion, open that database and select
Improve your Jira syncat the top.
From here:
In the window that appears, select
Get started.If you’re a workspace owner, enter your Jira admin email, Jira site URL, and API token, then select
Next. If you’re not an admin of the Jira instance, the API token won’t work when setting up the sync. If you’re a workspace member, reach out to your workspace owners for help enabling this integration.Select the Jira site you want to sync from.
Select
Create a new syncor select any existing sync you might already have in the dropdown menu. If you choose an existing sync, your projects will be added to your existing synced projects and issues databases.In the database that opens, you’ll need to connect your Jira account (unless you’re the workspace owner who set up the integration). From here, select the data you want to sync into Notion. First
Select projects to sync, thenSelect properties to sync.
Repeat the steps above if you’d like to set up another Jira sync for another site, teamspace, or workspace. Comments and attachments (up to five files per issue, no larger than 1MB) will also be synced.
You can apply permissions to the database page to make the synced databases accessible to your collaborators.
People property in your synced database
Synced databases will include people properties! Now, you can use identity mapping to connect third party JIRA identities to your team's Notion profiles. To do this:
Confirm you have implemented Jira Cloud.
If you’re an admin, go to Jira, click on
Jira System settings,and change the user email visibility fromHiddentoPublicinside your organization. If you're an individual user, you’ll need to manually change their settings by changing the email visibility option. Follow the instructions here →
Edit or delete your synced database
To edit the Jira projects and issue properties that have been synced to your Notion database, select ••• at the top of your synced database → Source.
To delete a Jira synced database, select ••• at the top of your synced database → Delete Table.
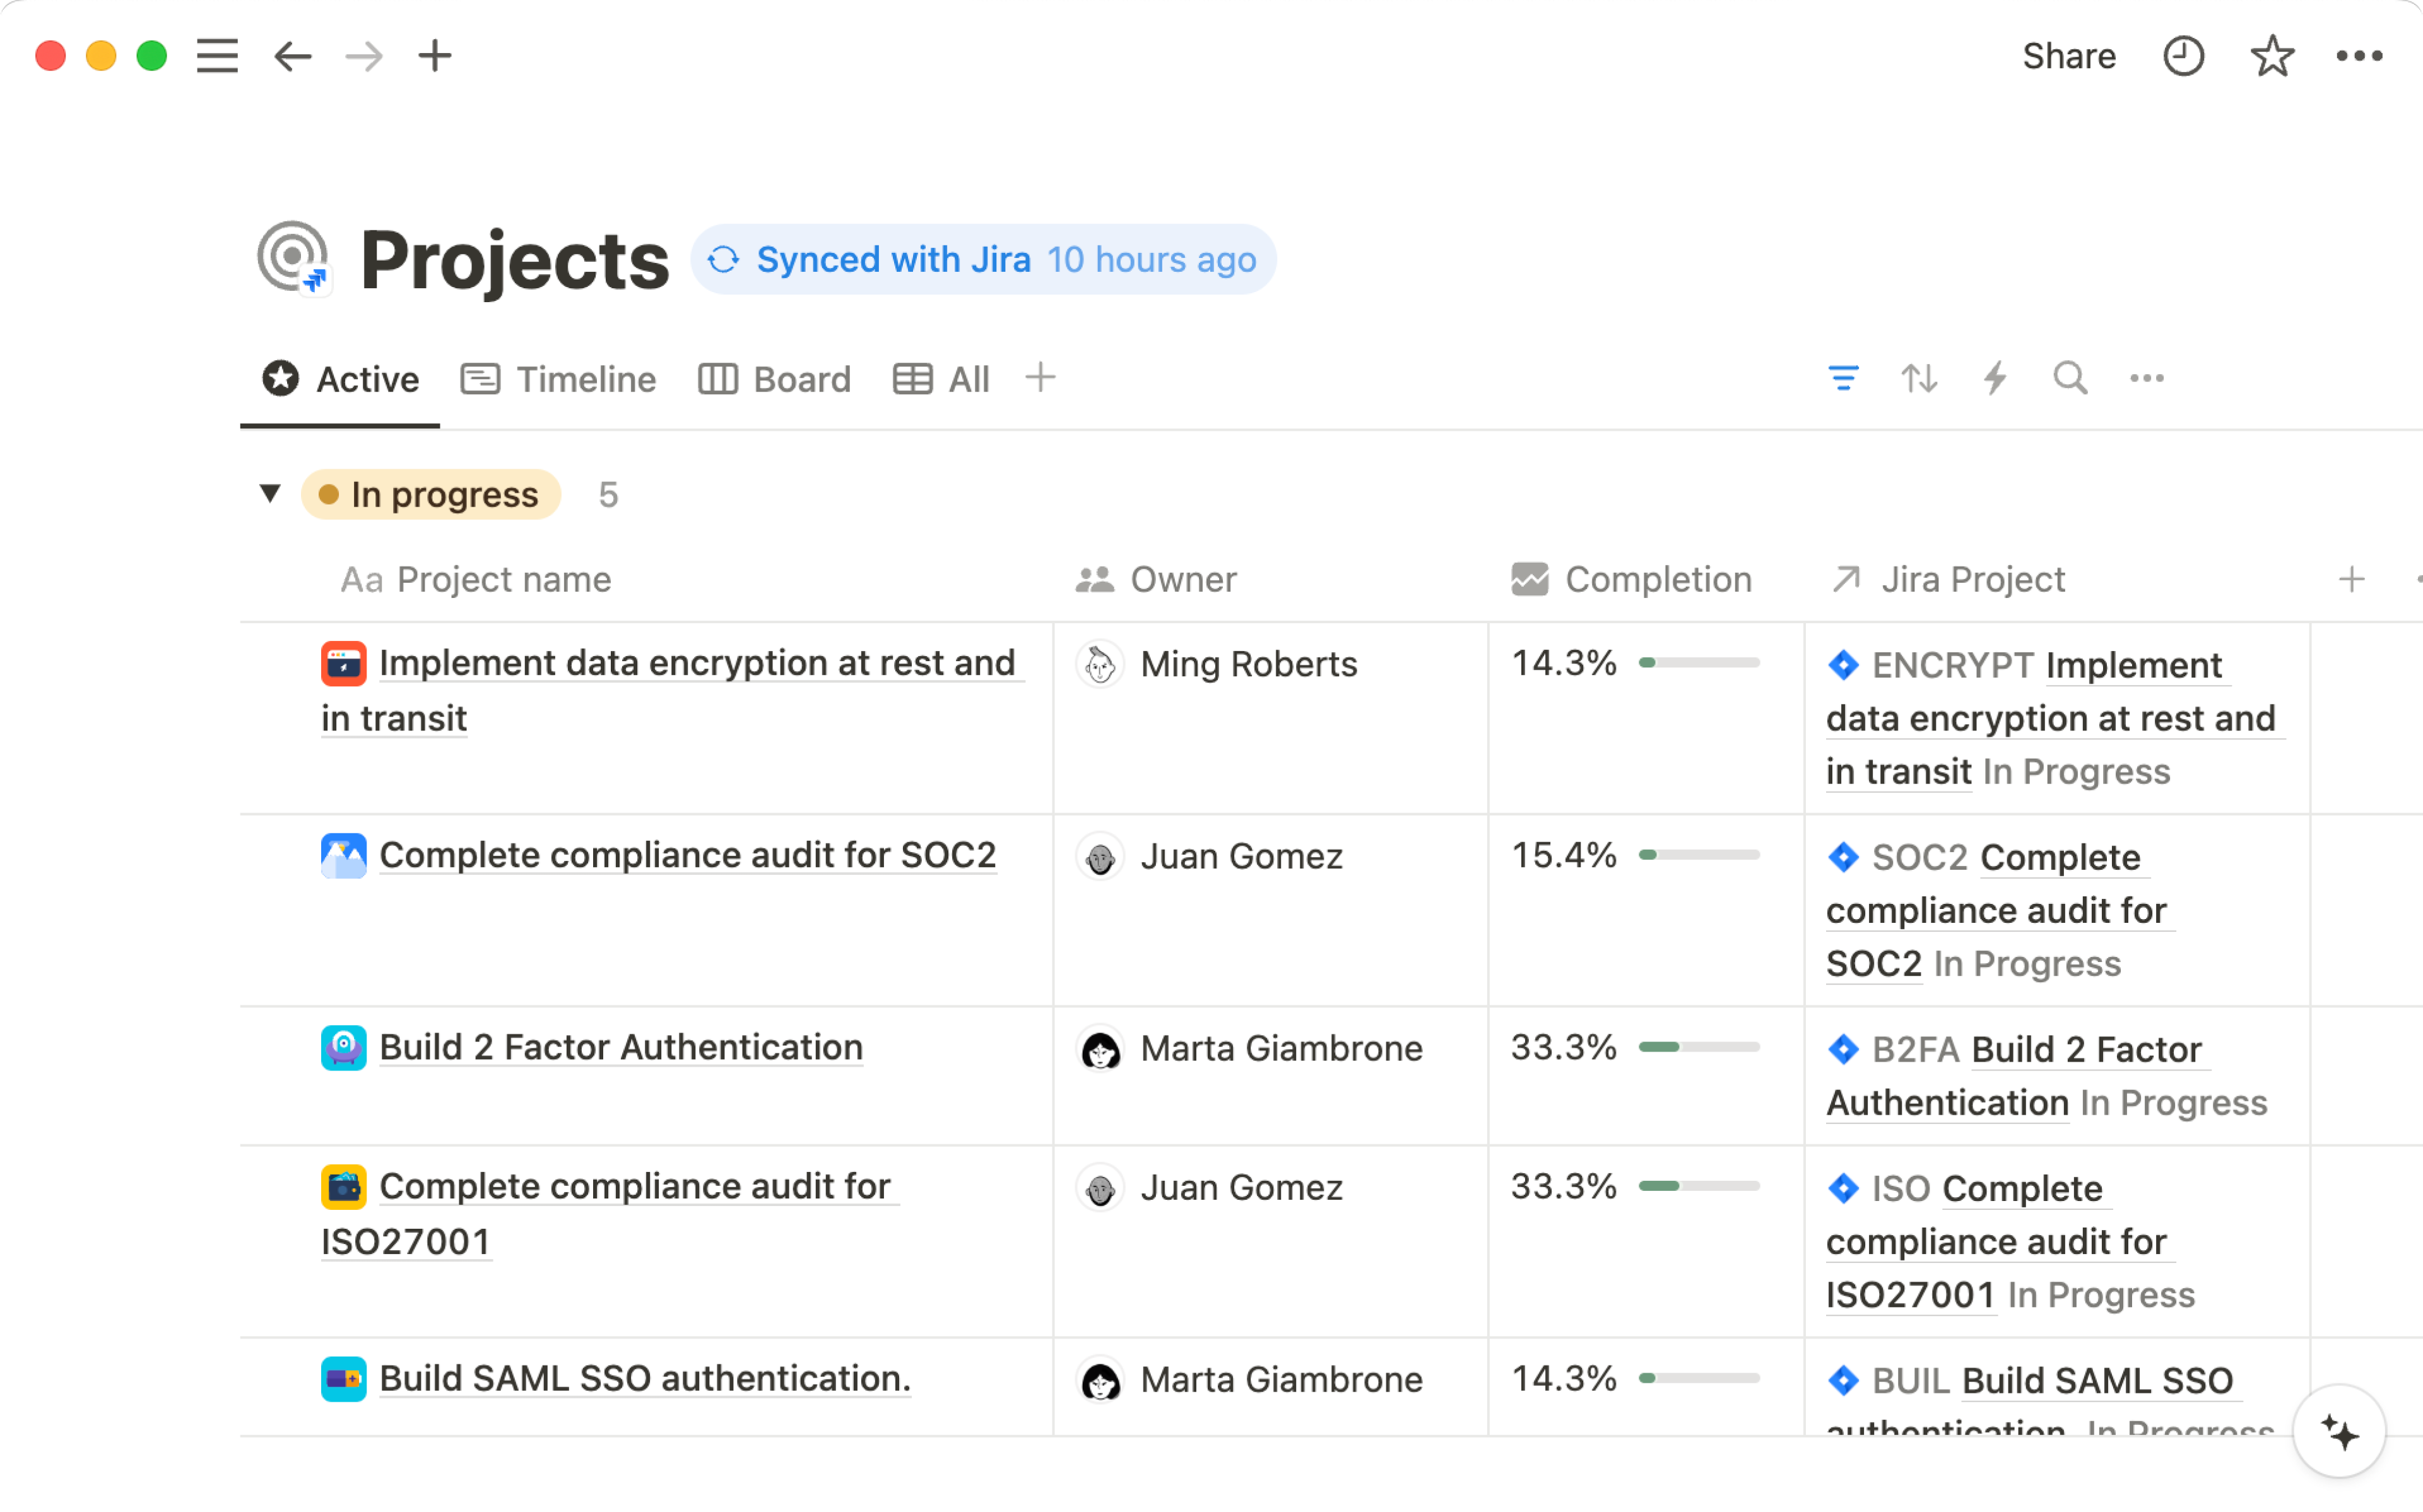
Projects database
Your Jira projects will be synced into a Notion projects database. Your projects will be intelligently mapped to their corresponding Jira issues in a related, synced issues database in Notion. This database will come with pre-populated default database views to help you get started more quickly:
Active (table view): This view shows the projects you’ve synced whose status is in progress. In other words, this view doesn’t show projects that have already been completed. There are also preset filters for owner and date to make searching easier.
Timeline view: This view displays project name, status, owner, and completion rate. There are also preset filters for status, owner, and date to make searching easier.
Board view: This view shows your projects grouped by status (
Planning,In Progress). You can customize the statuses that show in the view in the•••menu. Projects are sorted by descending priority.All (table view): This view displays all of your synced projects. There are preset filters for status, owner, and date to make searching easier.
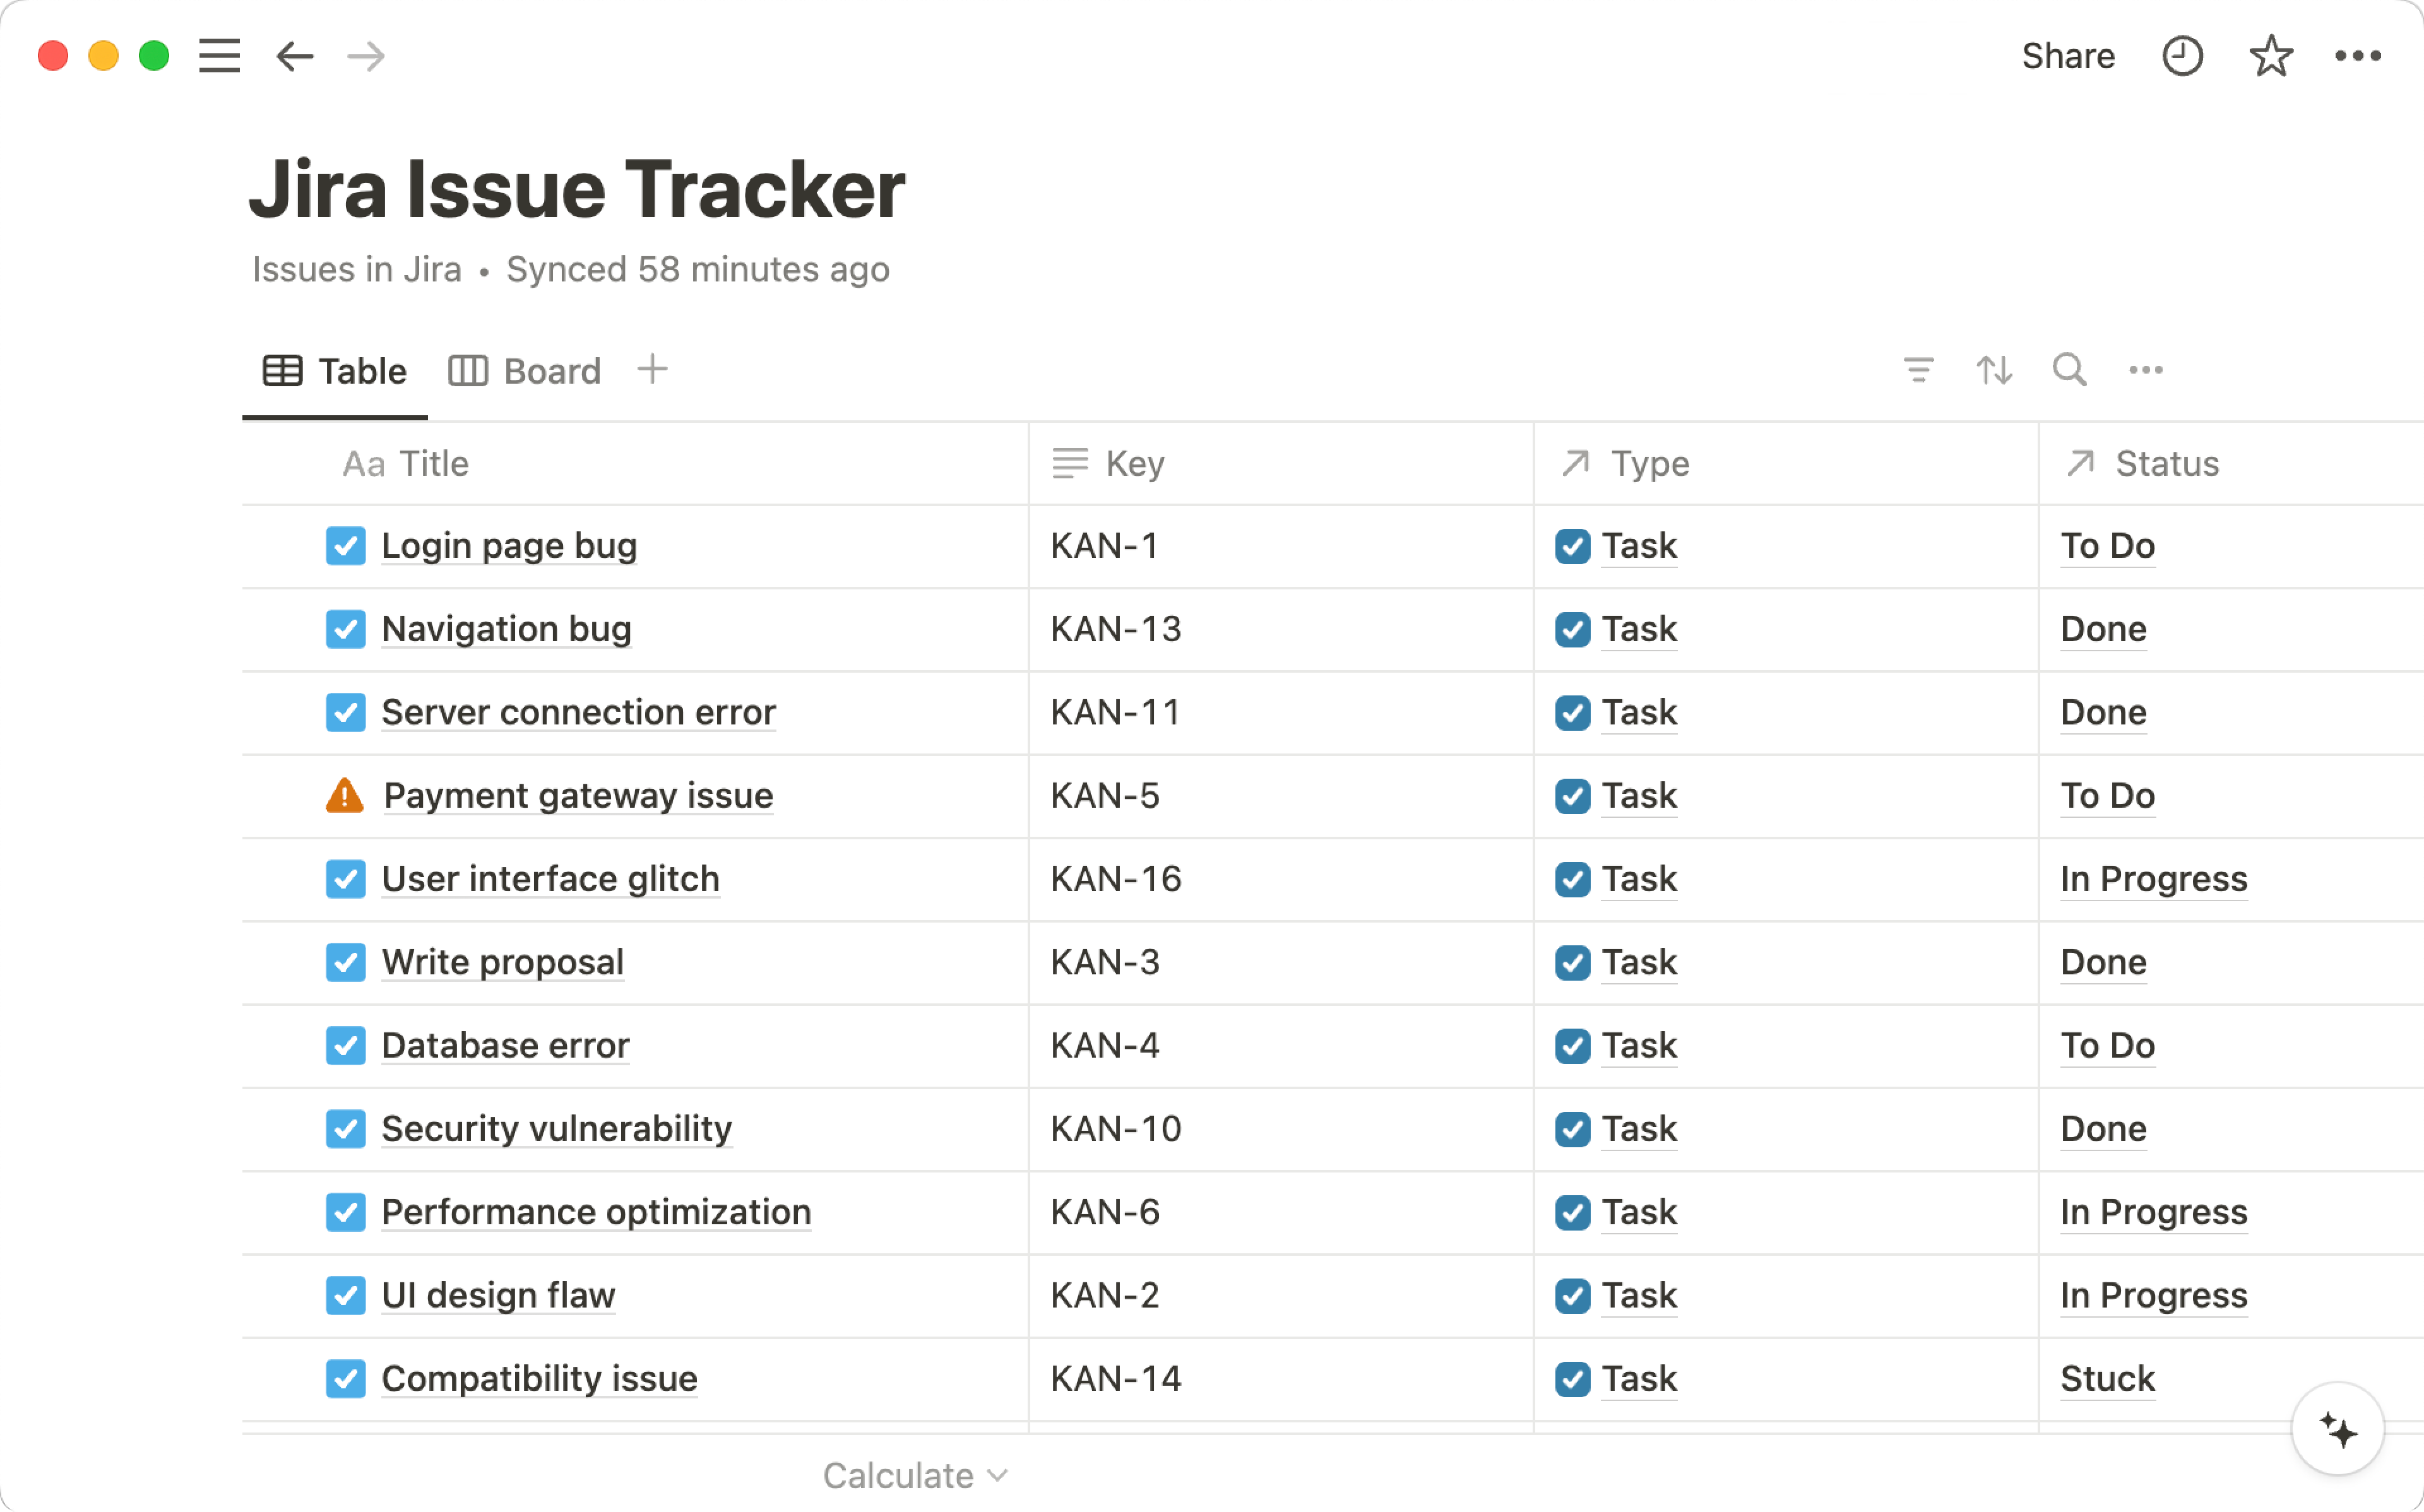
Issues database
Your Jira issues (epic, bug, task, subtask, story) will be synced into a Notion issues database, the equivalent of a Notion tasks database. As with the synced projects database, there will be default database views created for you to help you get started more quickly:
By Project (table view): This view shows all tasks, grouped by project. There are pre-set filters for status, assignee, date, and project to make searching easier.
By Epic (table view): This view shows your Jira stories, tasks, and bugs grouped by Epic.
Board view: This view is grouped by status and sorted by descending priority. The pre-set properties that will be displayed are assignee, project, priority, and sub-tasks,
All tasks (table view): This view displays all your synced tasks. The pre-set properties that will be displayed are task name, status, assignee, date, priority, tags, and project
Mine (table view): This view is filtered to only show tasks that are assigned to you. There are pre-set filters for status, date, and project.
It should only take a few minutes for the initial sync to complete, but depending on the size of your Jira projects and issues, this could take up to a few hours.
Some issue fields or properties may not sync, such as rich text in property and nested multi-selects.
Once the initial sync has been set up, updates to properties should be reflected in Notion in real time. If you create new properties, it could take up to 12 hours for those changes to sync.
You can’t manually sync Jira with Notion — syncs happen in response to updates made in Jira.
At this time, updates from Jira will sync to your Notion database in real time — not the other way around. Any changes you make in your Notion database won’t sync to Jira.
You’ll be able to see when Notion last
Synced with Jirawith Notion at the very top of a database. If instead you seeSync failedorSync stopped, you may have to follow the steps below to reconnect Jira.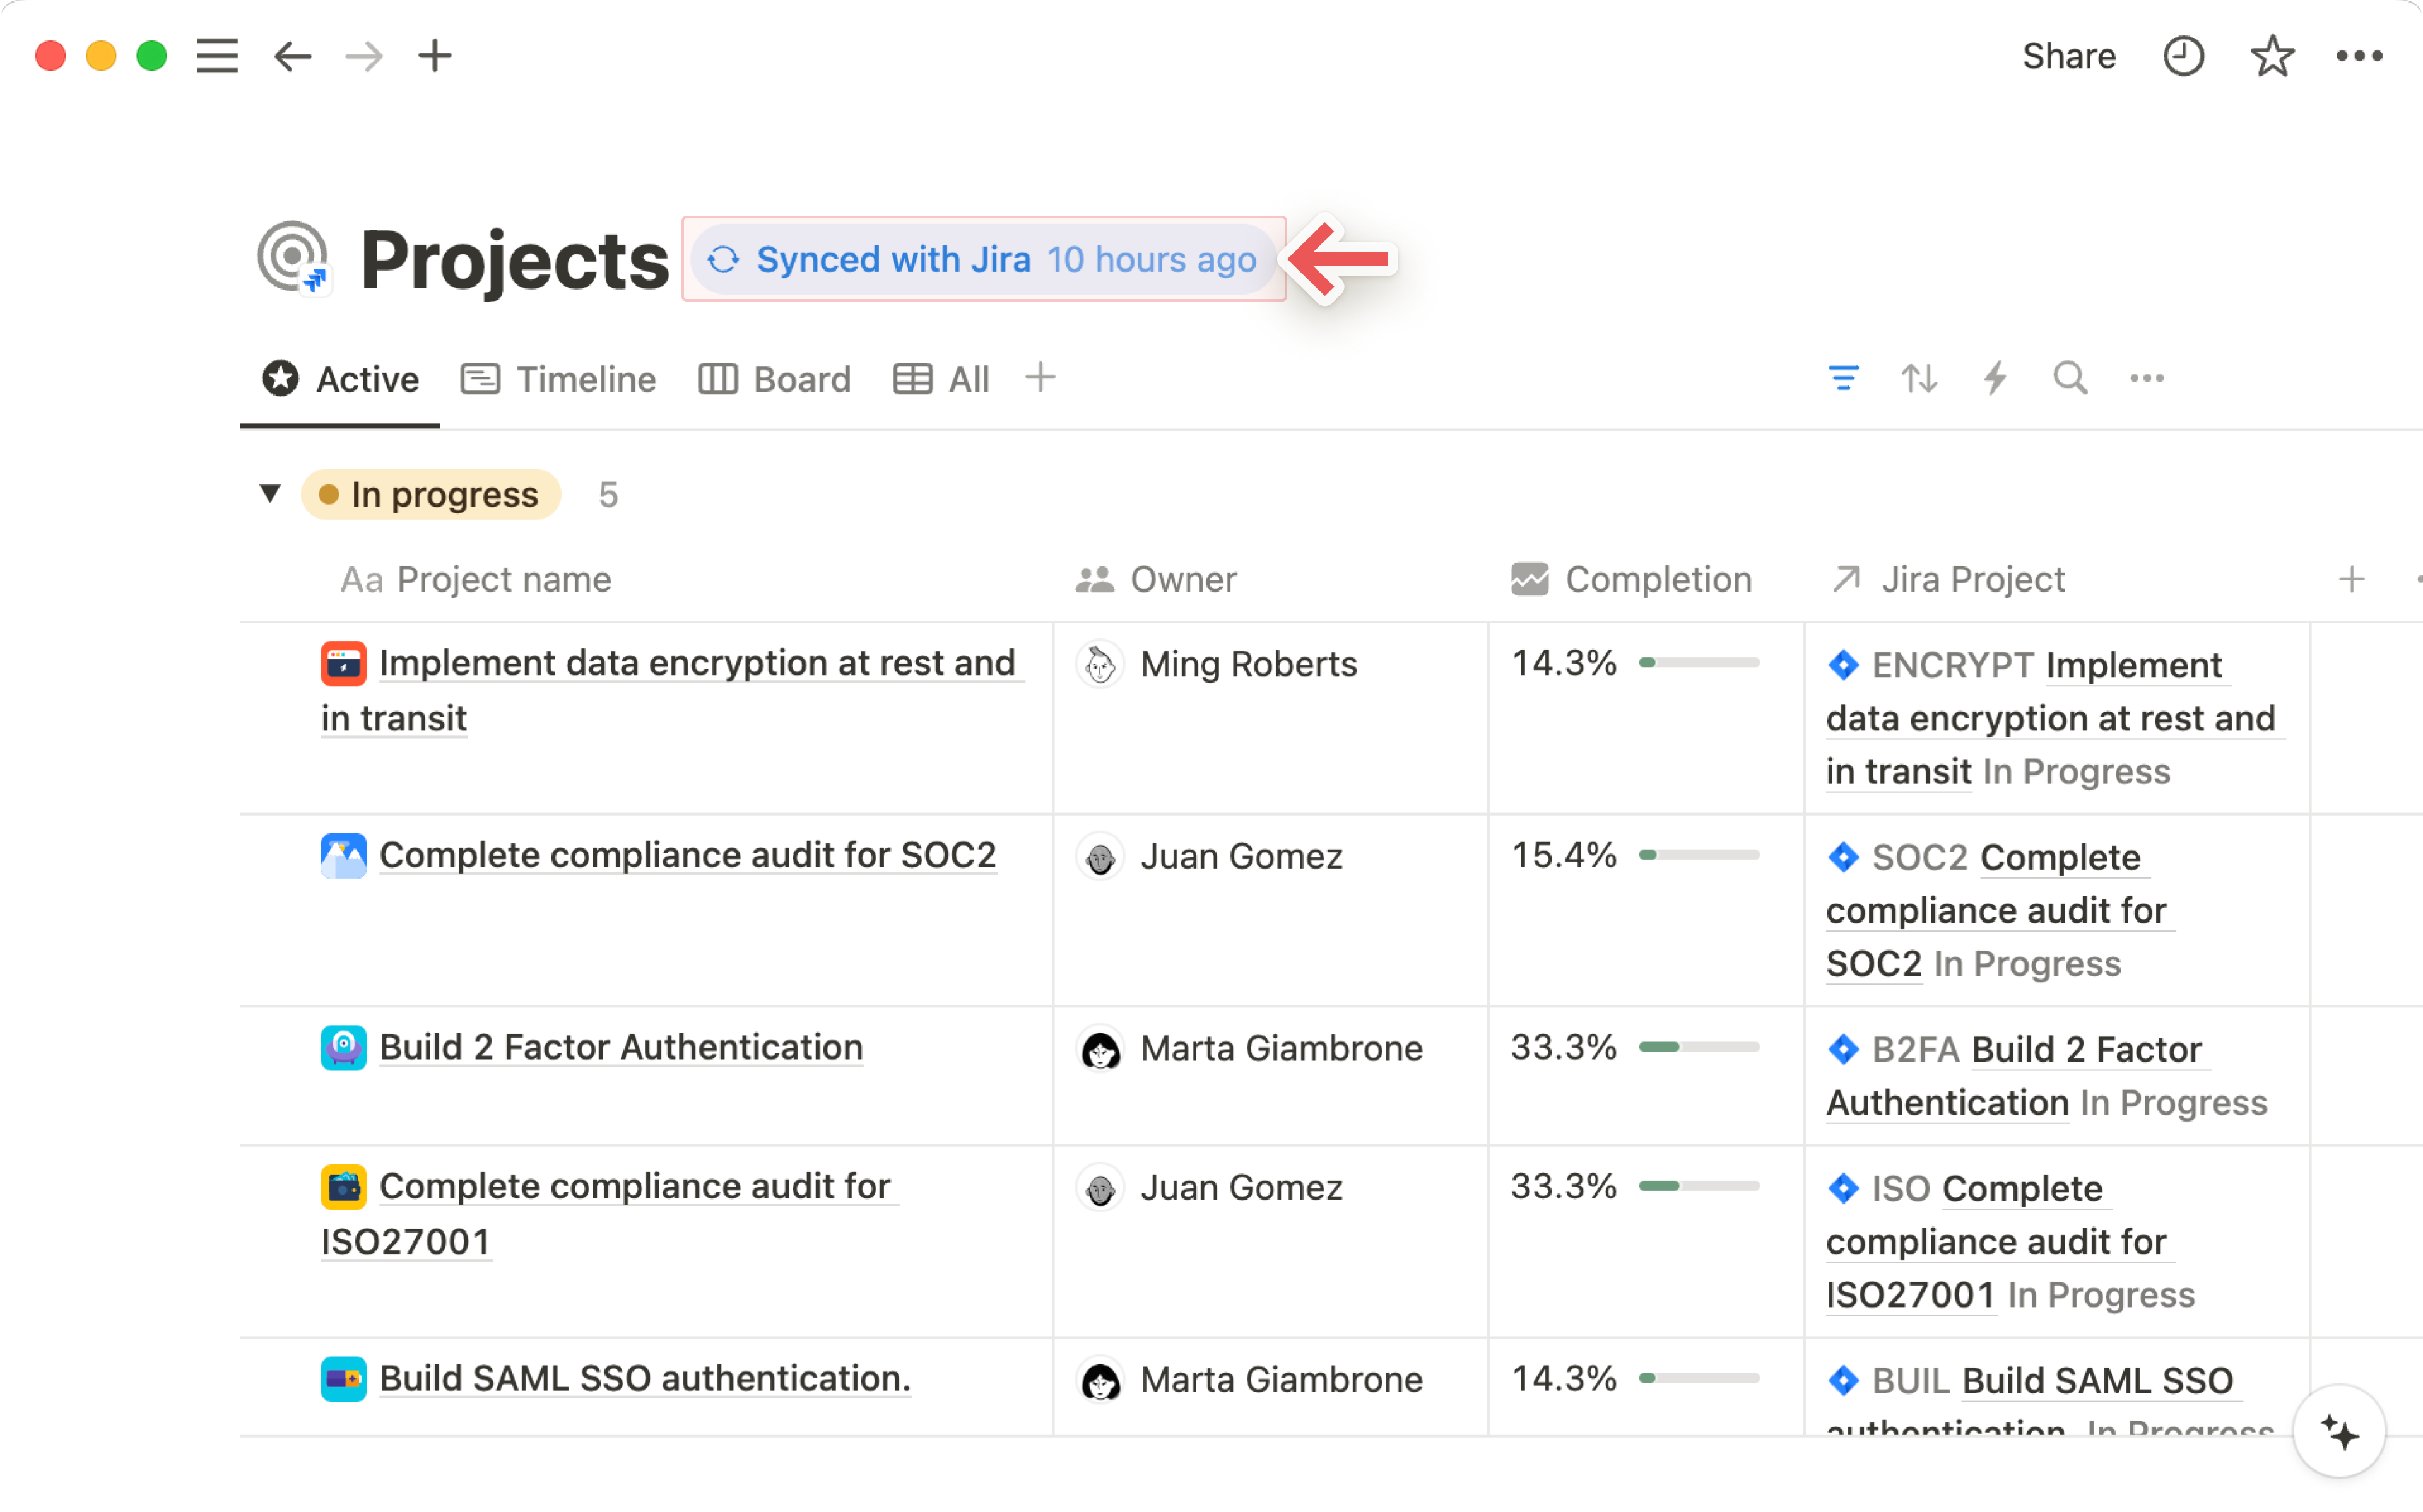
Make sure you have edit access or full access to a synced database if you want to add or remove projects or properties.
If you’re not seeing updates on the Notion side, try refreshing the page.
Note: If you delete a property in Jira, the associated database item in your synced database will be deleted too.
If your webhook registration has failed, or your project sync has failed, you’ll see Sync failed at the top of the database. To solve this issue, try the sync again with a different set of projects. You can also ensure that your projects don’t have any issues in Jira.
If your Jira token is no longer valid or someone has disconnected Jira from Notion, you’ll see Sync stopped at the top of the database. To solve this issue, select Re-authenticate next to Sync stopped. You must be a workspace owner to complete this process.
Once your Jira instance is reconnected with Notion, your projects and issues databases won’t be recreated; instead, you’ll continue to use the projects and issues databases you had before.
If you want to completely disconnect Jira from Notion, go to Settings & members in your sidebar → Import. Select ••• next to Jira → Remove.
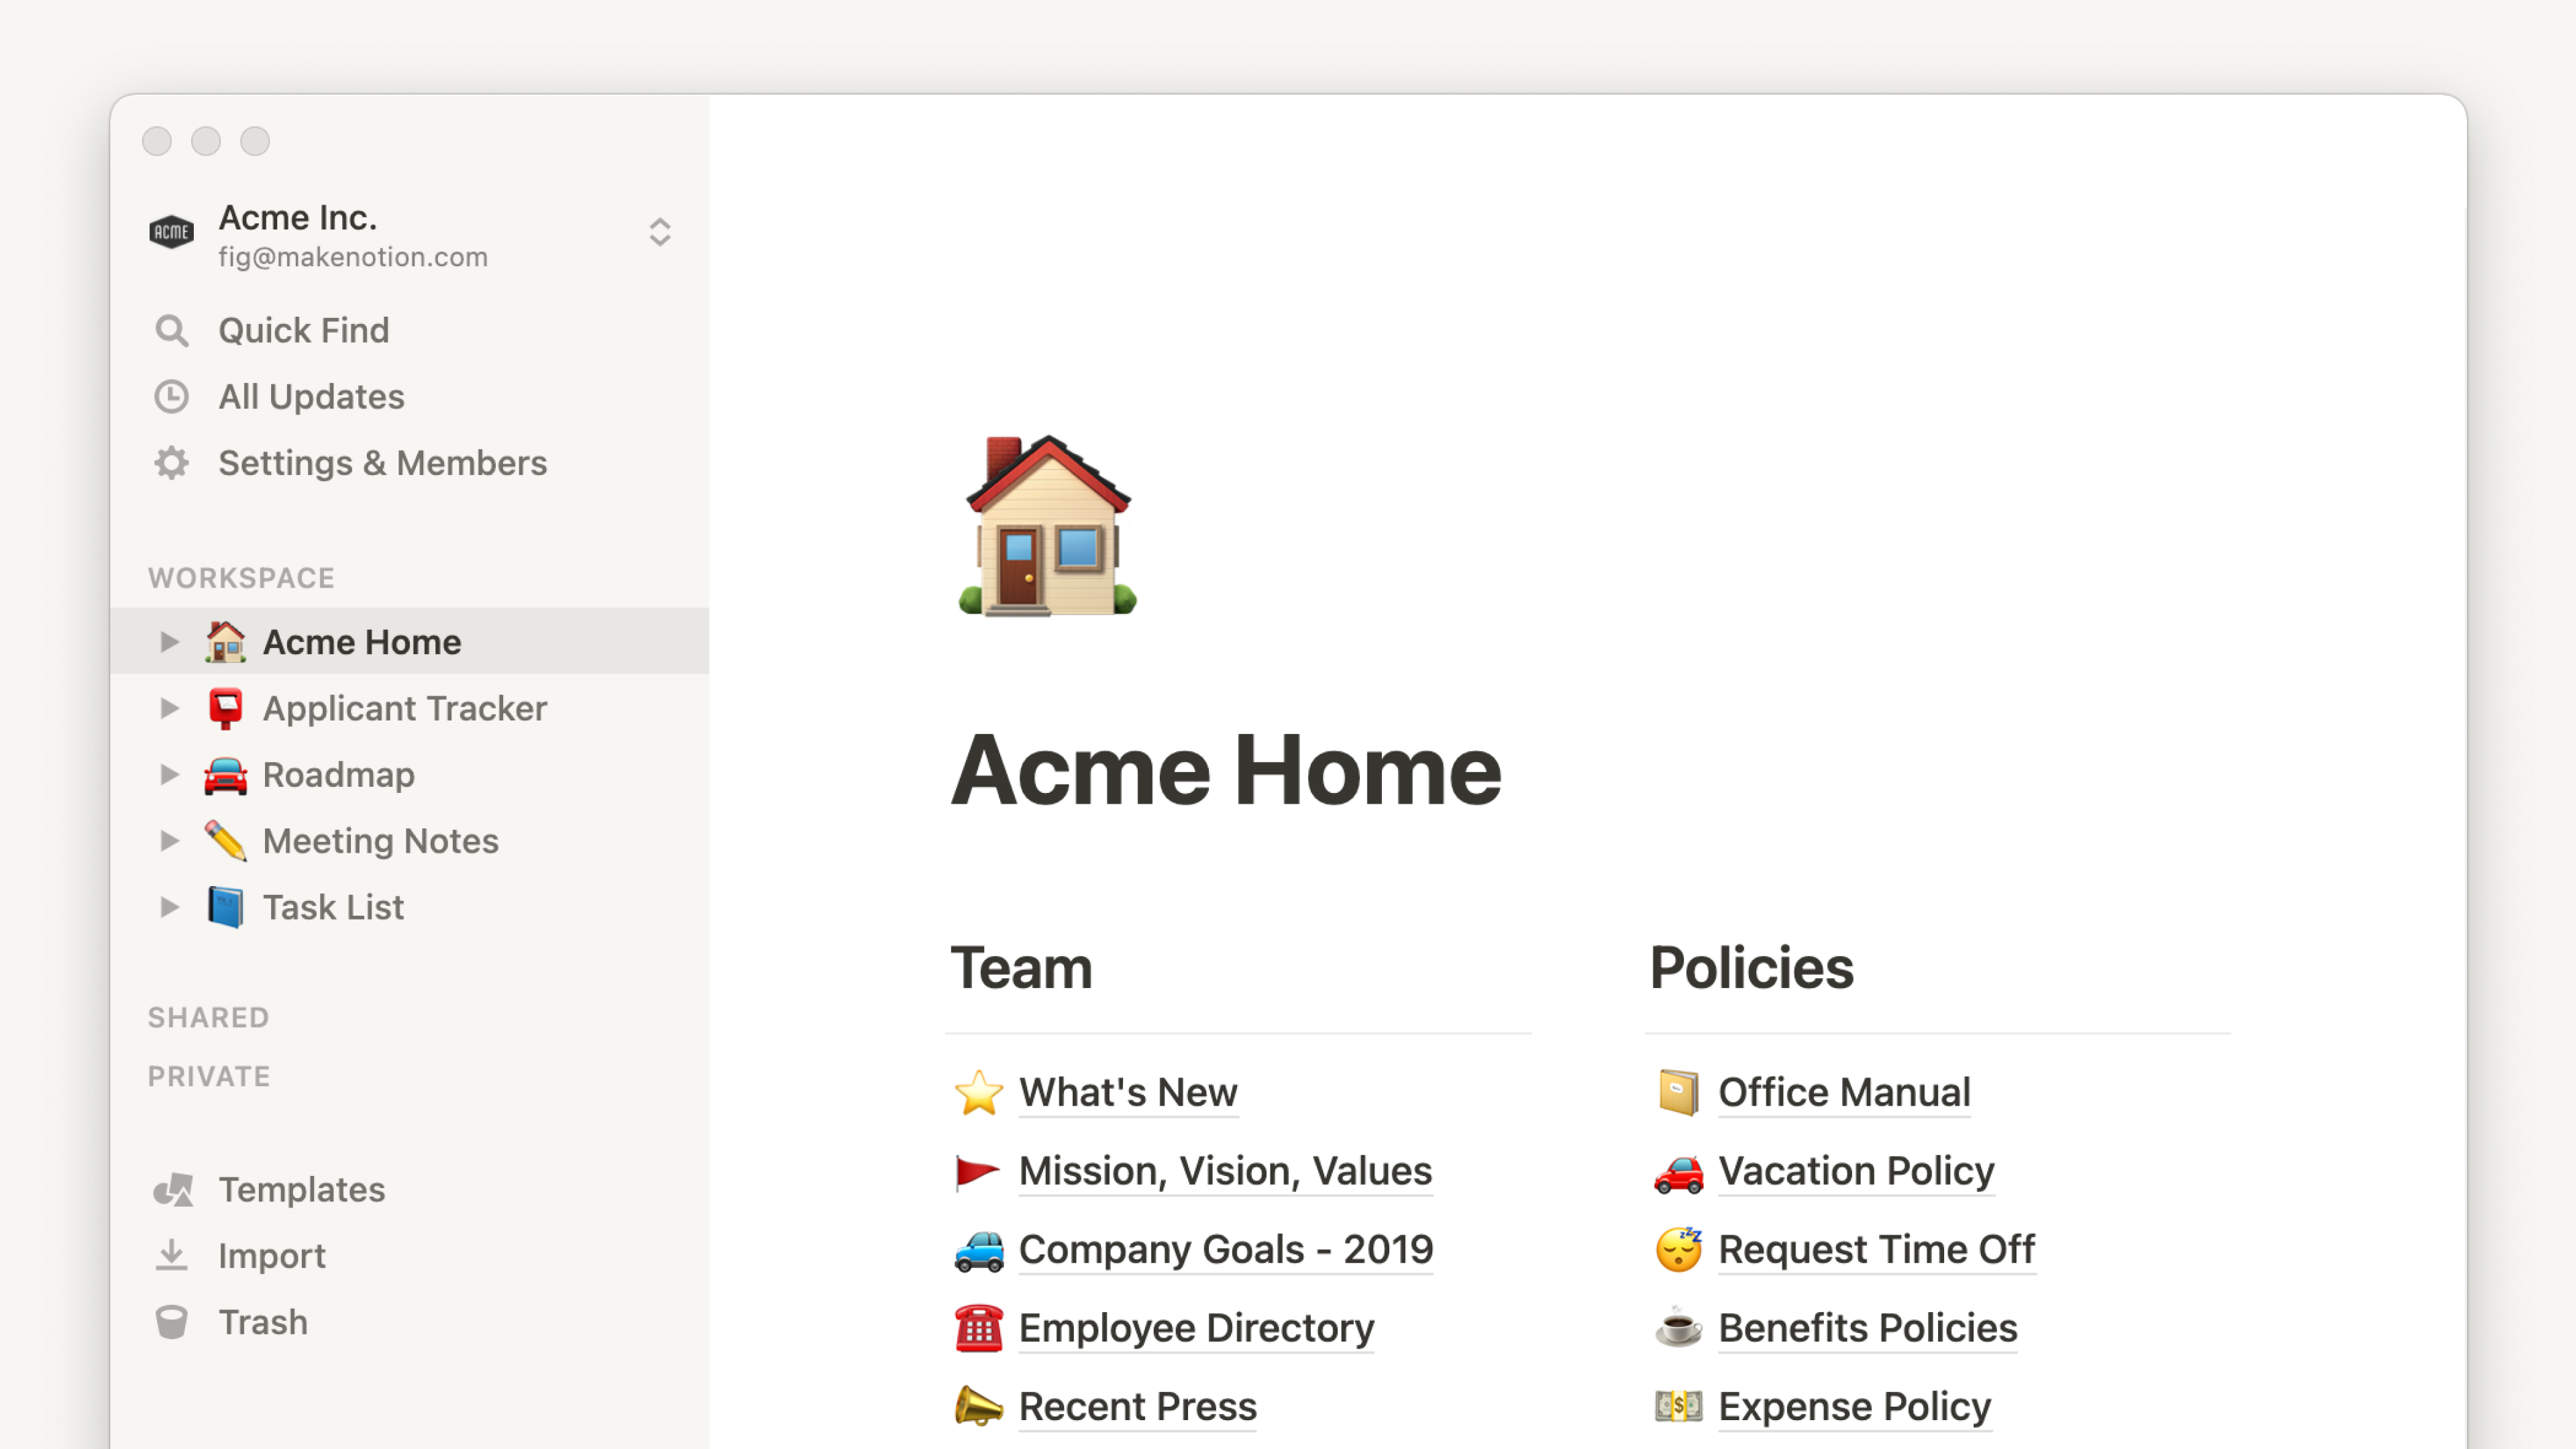
Legacy synced databases look something like this. If you do have a legacy synced database, you can follow the steps above to recreate your projects and issues databases in Notion using the new and improved Jira Sync.